
Looking to shoot at night? In this article we discuss the top 3 key tips to get the best footage when night filming | 5 Minute Read
best practices for night filming
THE CHALLENGES OF FILMING AT NIGHT
Sometimes the story you are telling calls for night shots.
COMMERCIALS, FILMS, & SOCIAL CONTENT all can benefit from a great cinematic nighttime scene.
Shooting after dark can change the vibe of your footage and compliment the message of your video.When the sun goes down most areas will look completely different than they do at high noon , or golden hour. The results tend to be more dramatic, moody, and mysterious.
It changes the mood.
Although shooting at night can add a great mood to your films, it’s not that easy to achieve high quality imagery.Because of the lack of lighting, there are hurdles in the way of doing it right. In this article we will discuss the pros and cons of shooting at night.
To get great night shots here are 3 key areas to focus on in order to get the best footage:
- MAXIMIZING YOUR LIGHT
- BEST NIGHT AREAS TO SHOOT
- BEST CAMERA SETTINGS TO USE
MAXIMIZING YOUR LIGHT
The hardest part about shooting at night is obvious. Your main natural light source ( the sun) is gone.
The absolute best time to shoot night shots is in “blue hour”. At dusk after golden hour or dawn before golden hour. At these times you will have a decent amount of natural light while the sky’s still blue and it will give you the night time look at your footage. However this is only a small sliver of time.
After blue hour ends the sky will be black and you will have to rely on available lights from cars, buildings or streetlamps, or set up your own.
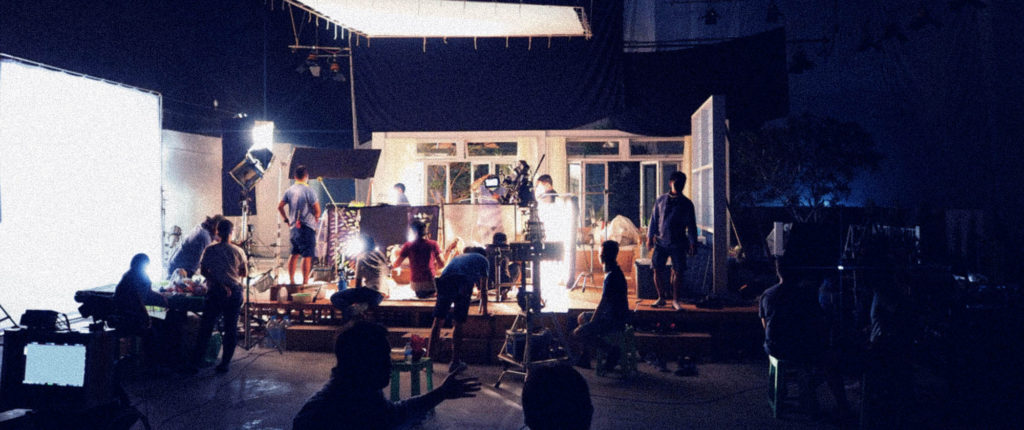
SETTING UP YOUR OWN LIGHTS: The next best option is to set up your own lights. If you have a higher budget, a solution is to set up a generator and use professional lighting to light your scene and subject. If your budget is small and can’t pay for a crew, you can set up a large light like the aperture 600x on a c stand connected to a v mount powered bay station. Any lights you can use that are portable will be better than nothing. We frequently use portable Bicolored TUBES to light night scenes, as they are powerful enough and very portable self powered lights.
STREET LIGHTS:
If you can’t bring lighting of any kind, you’ll have to work with your environment. Streetlights can provide a source of light to use. When you’re scouting locations at night, look for any street lamps or areas that have light to shoot your scene.
CAR HEADLIGHTS
Another great option is to use a car’s headlights to light an area. Hit the brights and see what happens.
REFLECTORS
The use of reflectors can help to redirect light onto a subject. You can shoot car headlights into a reflector and bounce it into an area for softer light than blasting someone with a car headlight.
WET STREETS:
Puddles and wet streets help reflect light and can create cinematic imagery for your scene. If you see an area with wet streets you may find it to be an interesting area to shoot. You can also hose down an area if it’s safe to do so and you want to add reflection to the ground.
BEST AREAS TO FILM AT NIGHT
The best areas to shoot are usually those with the most light, or areas with neon signs or interesting streetlights. Look for these areas when your scouting locations:
- Well lit buildings
- Areas with Street lights
- Wet streets
- Neon signs
BEST CAMERA SETTINGS / POST PRODUCTION FOR LOWLIGHT
There are 4 main tricks you can use with your camera to let in the most light and get the best results.
1.USE LENSES WITH LOW APERTURE:
Different lenses have different aperture thresholds. Lenses that can open up the iris more and let in more light are called “fast” lenses. The more light the cleaner the image. We recommend shooting with a lens that can open its aperture to 1.8 and wider for night filming.
Keep in mind that the lower your aperture setting the more narrow the depth of field. So this will affect the area of focus when shooting.
2.USE A FULL FRAME VIDEO CAMERA:
Just like a wider aperture, using a camera that has a full frame sensor will capture more light than those with a smaller sensor like super 35 and micro 4/3.
3.USE A FOCAL REDUCER:
A focal reducer aka a speedbooster can let in more light to your camera. You can find focal reducers for super 35 and micro 4/3 cameras.
4.BOOST ISO SIGNAL:
Boosting the ISO is a last result as this will only boost the signal and increase noise and grain of your shots. Only do so when you have too. Keep in mind this may destroy the image and render it unusable.
5.FIX IT IN POST
The dreaded 4 words for any video editor. “Fix it in post” If all else fails you can add some noise reduction to your clips and that can help clean them up. In some situations with little light this is your only option. Contact us here if you need help editing your project
CONCLUSION
Before filming at night make sure you are prepared and you have scouted the areas with best lighting conditions beforehand. Also make sure your camera settings and lenses are set up best for low light conditions. You can also make amazing content by having trained eyes looking for interesting areas that have enough light to film on the fly by following this guide.
If you need help creating content at night email us here